In summary:
- Your phone (Apple/Google Pay) works for almost all purchases, including the TTC, but be aware of the $250 tap limit.
- Use Express Mode on your iPhone for seamless TTC access without unlocking your device, even if the battery is low.
- While digital payments are king, a physical PRESTO card becomes more cost-effective if you use transit frequently over 4+ days.
- Avoid high ATM fees by using major bank machines and know where to find free charging spots to maintain your payment power.
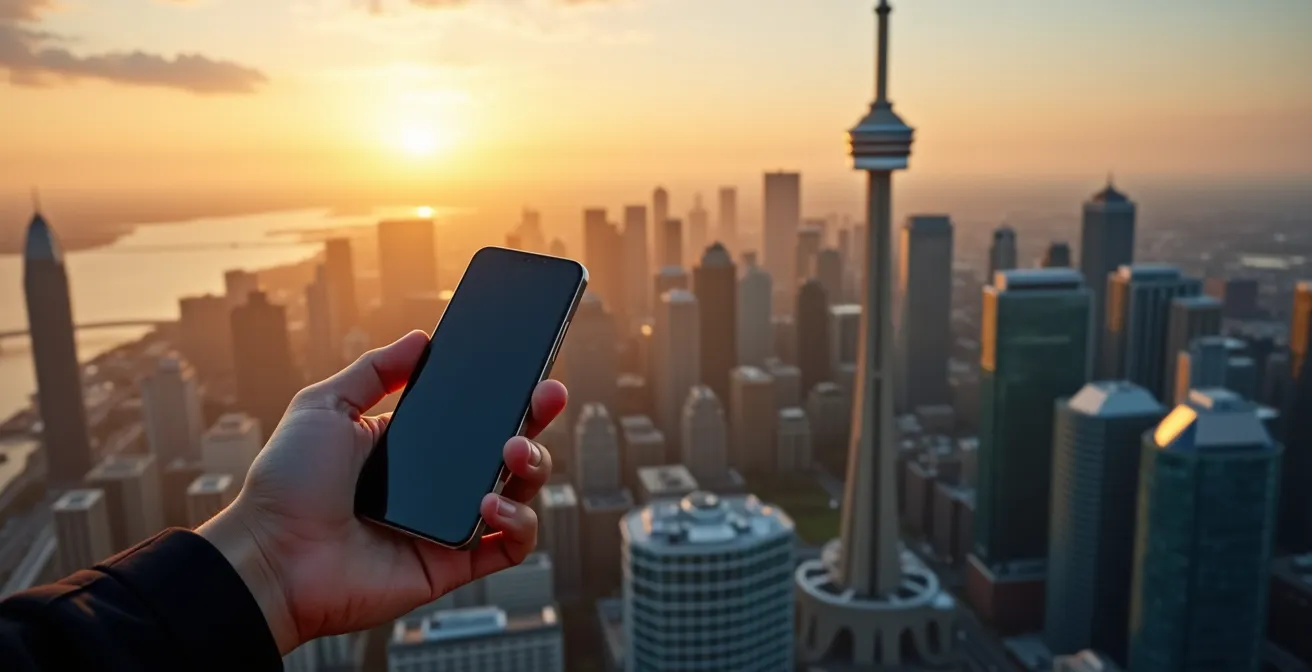
Imagine leaving your hotel in Toronto with nothing but your phone. No bulky wallet, no fumbling for change, just the sleek convenience of digital payments. For the tech-savvy traveler, this isn’t a futuristic dream; it’s an achievable reality. The common advice is simple: “tap-to-pay is everywhere.” While true, this statement hides the subtle complexities and “payment frictions” that can trip up even the most experienced digital native. True mastery of a cashless Toronto journey isn’t just about knowing you *can* tap; it’s about knowing *how* to tap for maximum efficiency and savings.
This goes beyond simply adding your card to your mobile wallet. It’s about understanding the hidden rules of the city’s payment ecosystem. What happens when your dinner bill exceeds the contactless limit? How do you navigate the TTC like a local, saving money on fares? What’s the digital etiquette for tipping, and what’s your backup plan if your battery dies? These are the questions that separate a smooth, frictionless experience from a frustrating one.
This guide is your key to achieving complete “ecosystem fluency.” We’ll move beyond the basics to decode the specific strategies for transit hacking, overcoming payment limits, and ensuring your phone remains your all-powerful key to the city. We will explore the nuances of each payment scenario, turning you from a simple user into a savvy digital local who navigates Toronto’s financial landscape with effortless confidence.
In this guide, we’ll break down everything you need to know to go completely cashless in Toronto, from the hard limits of tap-to-pay to the soft skills of digital tipping. Here’s a look at the key areas we will cover to ensure your journey is seamless.
Summary: A Tech Traveler’s Guide to Digital Payments in Toronto
- Why You Still Need a Physical Card for Purchases Over $250?
- How to Use Apple Pay on the TTC/PRESTO Readers?
- Apple Pay vs. Google Wallet: Which Is More Widely Accepted?
- The Battery Mistake That Strands You Without Payment Power
- When to Ask for the Terminal to Tip on a Contactless Order?
- Why Buying a PRESTO Card Saves You Money After 4 Days?
- How to Find ATMs That Don’t Charge $5 Fees?
- Getting Around Toronto: How to Choose Between TTC, Uber, and Walking?
Why You Still Need a Physical Card for Purchases Over $250?
The dream of a completely wallet-free existence in Toronto hits its first major friction point with larger purchases. While you can tap your phone for coffee, transit, and groceries with ease, you’ll encounter a hard limit on higher-value transactions. This isn’t a limitation of your phone or mobile wallet, but a network-level rule for contactless payments in Canada. For your security, and that of the merchants, there’s a cap on how much you can spend in a single tap.
Currently, Canadian cardholders can access the highest contactless payment limit at C$250. If your restaurant bill or shopping spree exceeds this amount, your tap will be declined. This is the moment where your digital-only strategy requires a physical backup. The payment terminal will prompt you to insert or swipe your card, forcing you to revert to the traditional chip-and-PIN method. For a tech-savvy traveler, this means a minimalist wallet or cardholder with one physical credit card is still a non-negotiable travel companion.
When this happens, the process is straightforward but requires you to switch gears from a seamless tap to a more deliberate action. Here is the typical flow:
- The terminal will display the amount. If it’s over $250, tapping your phone will result in a “Transaction Declined” or similar message.
- The cashier will likely instruct you, or the terminal will display, “Insert or swipe card.”
- At this point, you’ll need to produce your physical card and insert the chip into the bottom of the terminal.
- Finally, you will be prompted to enter your PIN to authorize the purchase.
Understanding this limit ahead of time prevents that moment of confusion at checkout. It’s a key piece of knowledge for maintaining payment resilience and ensuring you’re prepared for any transaction, big or small.
How to Use Apple Pay on the TTC/PRESTO Readers?
Navigating Toronto’s public transit (TTC) is where your phone truly becomes a magic wand. Gone are the days of fumbling for tokens or exact change. The PRESTO system is fully integrated with contactless payments, meaning you can tap your phone or smartwatch running Apple Pay or Google Wallet directly on the readers at subway gates and on buses or streetcars. The process is designed to be frictionless, but a key feature, especially for Apple users, elevates the experience: Express Mode.
Activating Express Mode for your transit card in Apple Wallet is a game-changer. As confirmed by user reports, this feature allows you to simply hold your iPhone or Apple Watch near the PRESTO reader to pay. You don’t need to wake the screen, unlock your device with Face ID or Touch ID, or open the Wallet app. This small “transit hack” saves precious seconds and makes boarding feel seamless, especially during rush hour. It’s the closest you’ll get to a truly effortless tap-and-go system.
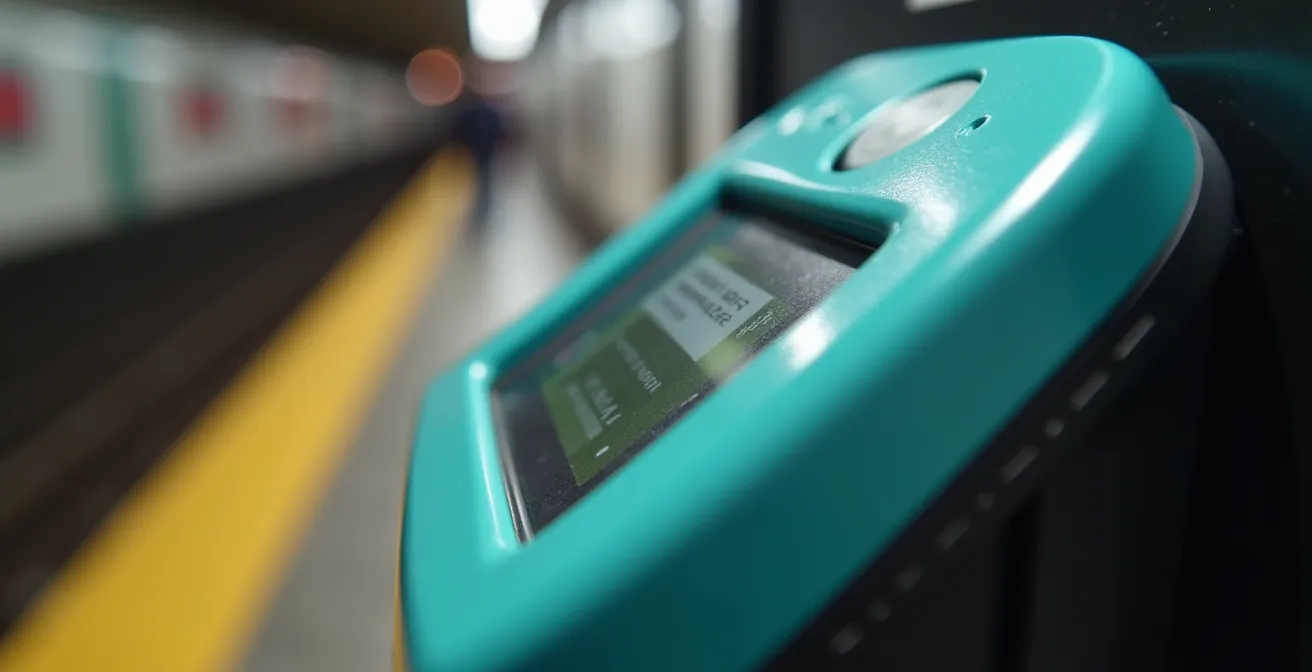
As you can see from the design of the PRESTO terminal, the designated contactless zone is clearly marked. This is your target. Whether you’re using Express Mode or authenticating a payment manually, a quick and direct tap on this area is all that’s needed. The system is incredibly responsive, providing instant feedback with a chime and a “Accepted” message on the screen, letting you proceed through the fare gates or find a seat.
To set up Express Mode, open your iPhone’s Settings, go to “Wallet & Apple Pay,” tap on “Express Transit Card,” and select the credit or debit card you wish to use for TTC fares. Once enabled, your device is ready. This small setup step is crucial for achieving peak ecosystem fluency within Toronto’s transit network, making every journey smoother.
Apple Pay vs. Google Wallet: Which Is More Widely Accepted?
When it comes to retail and dining in Toronto, the battle between Apple Pay and Google Wallet is effectively a tie. Any establishment that accepts tap-to-pay (which is nearly ubiquitous) will accept both. The underlying NFC technology is standardized, so if you see the contactless symbol on a payment terminal, your phone will work regardless of whether you’re on iOS or Android. In Canada, over 37% of payments are now made using Apple Pay or Google Pay, showcasing the widespread infrastructure and consumer adoption.
The real differences emerge not in retail acceptance, but in the nuanced features related to transit and device functionality. Both platforms allow you to add a digital PRESTO card and use credit/debit cards for fares. However, the user experience can vary slightly, particularly around convenience features like Express Mode and Power Reserve, which can be critical for a traveler relying solely on their device.
To help you understand the subtle but important distinctions, here is a breakdown of how the two platforms compare specifically for a visitor in Toronto.
| Feature | Apple Pay | Google Wallet |
|---|---|---|
| PRESTO Card Storage | Yes (Digital PRESTO) | Yes (Digital PRESTO) |
| Express Mode for Transit | Yes (no authentication needed) | Yes (wake screen only) |
| Power Reserve Mode | Up to 5 hours after battery dies | Varies by device |
| TTC Acceptance | All stations and vehicles | All stations and vehicles |
| Loyalty Card Integration | PC Optimum, Scene+ | PC Optimum, Scene+, Triangle |
While both systems are excellent, Apple Pay currently has a slight edge in terms of “payment resilience” due to its well-defined Power Reserve feature. For Google Wallet, this functionality is hardware-dependent and less standardized across different Android phones. Google Wallet, on the other hand, offers slightly broader integration with Canadian loyalty programs like Canadian Tire’s Triangle Rewards. Ultimately, the best choice is the one you already have, as both provide a robust and reliable cashless experience across Toronto.
The Battery Mistake That Strands You Without Payment Power
The single greatest fear for a traveler committed to a cashless journey is a dead phone battery. A device without power is not just a communication tool gone dark; it’s a wallet and transit pass rendered useless. The most common mistake is assuming that 0% battery means 0% payment capability. Modern smartphones, particularly iPhones, have built-in safeguards to prevent you from being stranded. This concept of payment resilience is crucial to understand.
Thanks to the iPhone’s Power Reserve feature, you can still use your device for transit payments for up to five hours after the main battery has died. As Apple and Metrolinx have highlighted, this feature works seamlessly with Express Mode on the TTC. If your phone shuts down on the way to the subway, you can still confidently tap your device at the PRESTO reader and get on your way. This isn’t a glitch; it’s a deliberate design choice to provide a critical lifeline for commuters and travelers.
However, this resilience has its limits, and it doesn’t apply to regular retail purchases that require authentication. The best strategy is proactive battery management. Avoid the mistake of leaving your hotel with less than 50% charge if you plan a full day of exploration. Constant use of maps, photos, and social media will drain your battery faster than you think. If you do find yourself running low, don’t panic. Toronto has numerous spots where you can get a quick power-up. Here are a few key locations:
- Union Station: Look for charging stations in the Great Hall and York Concourse, accessible 24/7.
- Toronto Reference Library (789 Yonge St): Free charging stations are available on all floors during opening hours.
- Eaton Centre: Find charging lounges near the Hudson’s Bay entrance and in the main food court.
- Major TTC stations: Newer benches at hubs like Bloor-Yonge, St. George, and Dundas often have built-in USB ports.
- Shoppers Drug Mart: Nearly every corner has one, and most downtown locations sell affordable power banks if you need a portable solution.
Knowing these locations is part of a smart traveler’s toolkit. It transforms the fear of a dead battery from a trip-ending disaster into a minor, manageable inconvenience.
When to Ask for the Terminal to Tip on a Contactless Order?
Navigating tipping culture is a classic traveler’s challenge, and going cashless adds a layer of digital etiquette. In Toronto, tipping is not just appreciated; it’s a standard part of the service economy. The general expectation in restaurants and bars is a tip of 15-20%. When you’re paying with a tap of your phone, the process can sometimes feel rushed, and the opportunity to tip might not be immediately obvious. This is a moment of potential “social friction” where knowing the process is key.
In most full-service restaurants, the server will bring a portable payment terminal to your table. Before you’re prompted to pay, the terminal will first display tipping options, usually as percentages (15%, 18%, 20%) or a custom dollar amount. You simply select your desired tip, and the total is updated. Only then will the terminal prompt for payment, at which point you can tap your phone. The process is smooth and integrated.
The confusion can arise in counter-service situations, like at a coffee shop or a quick-service lunch spot. Sometimes, the cashier will simply enter the total and turn the terminal to you for a tap, bypassing the tip screen. If you wish to leave a tip and weren’t given the option, it is perfectly acceptable and often appreciated to simply say, “Could I add a tip on there?” The cashier can easily go back to the tipping menu on their end before you pay. Don’t be shy about asking; it’s a common request and shows you’re familiar with the local custom.
Understanding this simple interaction is a core part of digital etiquette in Toronto. It ensures you can show appreciation for good service without the need for cash, keeping your entire financial interaction seamless and digital. While tipping at self-service cafes is less expected, leaving a small amount is a common practice if you received friendly or helpful service.
Why Buying a PRESTO Card Saves You Money After 4 Days?
For a short trip to Toronto, using your phone’s tap-to-pay feature on the TTC is the pinnacle of convenience. You pay the standard adult fare with zero setup. However, if your stay extends beyond a few days, or if you plan to use transit extensively, this convenience starts to cost you money. This is where a bit of “transit hacking” by understanding the PRESTO fare structure comes into play.
The key difference lies in the concept of “fare capping.” When you tap a credit or debit card (or your phone’s mobile wallet), you pay the same adult PRESTO fare of $3.30 per trip, with a two-hour transfer window. However, there is no daily or weekly cap on these payments. In contrast, a physical PRESTO card, while costing $6 to purchase, has fare caps built-in. After a certain number of rides in a day or week, your subsequent rides become free.
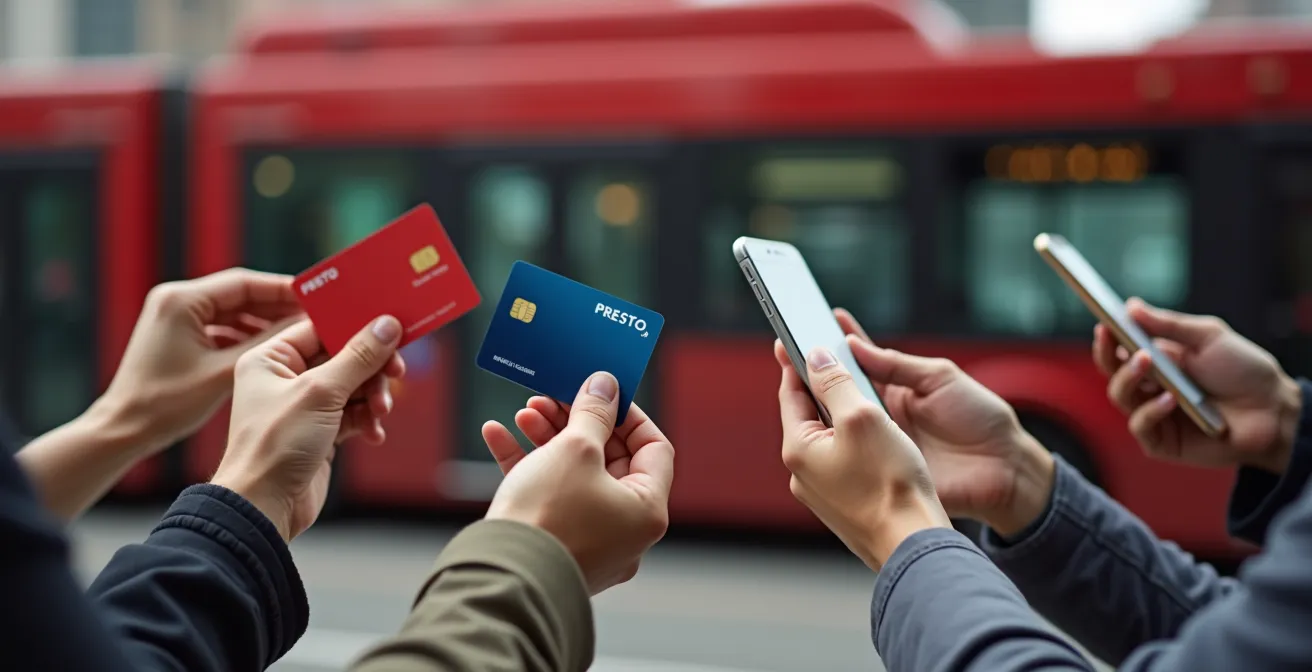
Let’s do the math. A daily pass on the TTC costs $13.50. At $3.30 per ride, you’d need to take more than four trips in a day for the pass to be worthwhile. A weekly pass (loaded onto a PRESTO card) costs $43.75. The breakeven point comes after about 13 rides in a week. If you’re a tourist making, on average, two round trips per day (four rides), you’ll hit that breakeven point on the fourth day of your trip. From that point on, every ride you take with the weekly pass is effectively free compared to continuing to pay-per-ride with your phone.
Therefore, the decision is simple: for a weekend trip (1-3 days), stick with the convenience of your phone. For a trip of four days or longer with moderate to heavy transit use, investing $6 in a physical PRESTO card and loading a weekly pass on it will save you money. It’s a classic trade-off between upfront convenience and long-term cost-effectiveness.
How to Find ATMs That Don’t Charge $5 Fees?
Even in a hyper-modern city like Toronto, there might be rare occasions where you need a small amount of cash—for a street vendor, a small independent shop, or simply for peace of mind. This is where your cashless strategy needs a reliable backup plan. The biggest friction point here is avoiding exorbitant ATM fees, which can quickly turn a $20 withdrawal into a $25 expense.
The ATM landscape in Toronto is divided. First, there are the ATMs belonging to the “Big 5” Canadian banks: RBC, TD, BMO, CIBC, and Scotiabank. These typically charge non-clients a fee of around $3-$3.50 per transaction. Then there are the “white-label” ATMs found in convenience stores, bars, and hotels. According to a Ratehub.ca analysis, these machines can charge anywhere from $1.50 to an eye-watering $5.00 per transaction or more. The cardinal rule for any traveler is to avoid these white-label machines at all costs.
Your goal is to minimize or eliminate these fees entirely. Sticking to the Big 5 bank ATMs is the first step, but you can do even better by employing a clear strategy. Having a plan for when you absolutely need cash ensures you don’t waste money on unnecessary fees.
Your Action Plan: Avoiding High ATM Fees in Toronto
- Target Big 5 Banks: Exclusively use ATMs located at or branded by TD, RBC, BMO, CIBC, or Scotiabank. Avoid all generic or “white-label” machines.
- Check for Partnerships: See if your home bank is part of the Global ATM Alliance. For example, Bank of America customers can use Scotiabank ATMs with no access fee.
- Prefer Bank Branches: Opt for ATMs located inside a bank branch rather than standalone machines on the street, which are more likely to be tampered with.
- Withdraw Larger Amounts: If you must withdraw cash, take out a larger sum once rather than small amounts multiple times to minimize the impact of per-transaction fees.
- Use Cashback: As a completely fee-free alternative, ask for cashback when paying with your debit card (this requires a physical card) at major grocery stores like Loblaws or Metro.
By following these steps, you can treat cash as a surgical tool, used only when necessary and acquired with minimal financial collateral damage. It’s the final piece in building a truly resilient and cost-effective payment strategy for your Toronto visit.
Key takeaways
- Master the $250 contactless limit by always carrying one physical card for larger purchases.
- Enable Express Mode for transit on your phone for the fastest, most seamless way to use the TTC.
- Understand that a physical PRESTO card offers better value than tap-to-pay for stays longer than four days due to fare capping.
Getting Around Toronto: How to Choose Between TTC, Uber, and Walking?
Your payment method is only one part of the equation; choosing your mode of transport is just as important for a smooth Toronto experience. The city’s downtown core is highly walkable, but its attractions are spread out enough that you’ll inevitably need to rely on other options. Your choice between the TTC, a rideshare service like Uber or Lyft, and simply walking will depend on a trade-off between cost, speed, and convenience. With digital payments now representing 86% of payment volume in Canada, every option is easily accessible without cash.
Walking is often the best way to experience the unique vibe of neighborhoods like Kensington Market or Queen Street West. It’s free, healthy, and allows for spontaneous discoveries. For longer distances, the TTC is the workhorse of the city. It’s affordable and, with your phone as your pass, incredibly easy to use. Ridesharing offers door-to-door convenience, which can be invaluable in bad weather or late at night, but it comes at a premium price.
To help you make the best decision on the fly, here’s a quick comparison of your main options for getting around the downtown area.
| Option | Cost (Downtown) | Payment Methods | Speed |
|---|---|---|---|
| TTC | $3.30 flat fare | PRESTO, Credit/Debit, Apple/Google Pay | Variable with traffic |
| Uber/Lyft | $8-15 typical | In-app payment only | 10-20 min typically |
| Bike Share | $3.99/30 min | Credit card, app payment | Predictable timing |
| Walking | Free | None required | 15-20 min/km |
A smart strategy often involves mixing these methods. You might take the subway to a neighborhood and then explore on foot, or use a bike for a scenic ride along the waterfront and an Uber to get back to your hotel after dinner. By having your payment methods set up for all these options on your phone, you give yourself the ultimate flexibility to choose the right mode of transport for any situation, fully optimizing your time and budget.
Frequently Asked Questions on Going Cashless in Toronto
What’s the standard tip percentage in Toronto restaurants?
The general guideline is to tip around 15-20% in restaurants and bars. Most payment terminals will offer these percentages as preset options, making it easy to select an appropriate amount.
Do I need to tip at self-service cafes?
While not as strictly expected as in full-service restaurants, it’s not uncommon to leave a small amount in a physical tip jar or add a dollar or two on the payment terminal if the option is presented. It’s a nice gesture for good service but is generally considered optional.
Is tipping expected in Toronto?
Yes, tipping is a prevalent and expected part of the service culture in Canada. Service industry wages are often structured with the assumption that employees will earn a significant portion of their income from tips. For a traveler, it’s best to consider it a standard part of the cost.