
Capturing a postcard-perfect photo of the Toronto skyline is less about the camera and more about the operational plan.
- Each viewpoint (Islands, Polson Pier, Riverdale) demands a unique logistical approach for access and timing.
- Environmental factors like spring fog are predictable risks that require a backup strategy.
Recommendation: Treat your photo session like a mission: scout your transport, master the timing, and always have a Plan B.
Every great city has a signature view, and for Toronto, that view is the glittering skyline rising above Lake Ontario. Countless visitors point their cameras from Polson Pier, hoping to snag that classic postcard shot. But as any seasoned location scout knows, the most breathtaking images are rarely the result of luck. They are the product of a mission—a plan that considers light, access, and timing with strategic precision. While many guides list the “what” and “where,” they often neglect the critical “how” and “when.”
Getting the shot involves more than just showing up with a tripod. It requires understanding viewpoint logistics: the ferry schedules for an island sunset, the safest public transit route to an industrial pier after dark, or the subtle compositional trade-offs between a park on the east side versus a bridge on the west. It’s about anticipating the environment, knowing that the same spring air that brings warm weather can also cloak the entire downtown in a thick blanket of fog, rendering a two-hour trip useless.
This guide abandons the simple list of spots. Instead, it treats each location as an operational objective. We’ll break down the strategy for a superior sunset shot from the Toronto Islands, detail the non-car-dependent ways to reach Polson Pier for its iconic night view, and weigh the panoramic merits of Riverdale Park against Humber Bay. We will equip you with the intel to manage environmental risks, configure your gear for crisp night photos, and even make the most of a tight two-hour window downtown. This is your field manual for executing the perfect Toronto skyline shot.
In this comprehensive guide, we’ll break down each key viewpoint and technical challenge into a clear, actionable strategy. The following sections provide the logistical intel needed to move from a casual tourist to a prepared photographer, ready to capture Toronto’s beauty in any condition.
Summary: A Strategic Guide to Toronto’s Best Skyline Views
- Why Sunset Views from the Islands Are Superior to Mid-Day Shots?
- How to Reach Polson Pier Without a Car for the Night View?
- Riverdale Park or Humber Bay: Which Offers the Best Skyline Panorama?
- The Fog Risk That Can Hide the Skyline Completely in Spring
- How to Configure Your ISO for Crisp Night Skyline Photos?
- Aquarium or Tower: Which Attraction Fits a 2-Hour Window?
- How to Rent a Quadcycle Before They Sell Out by Noon?
- Romantic Dates in Toronto: Where to Find the Most Breathtaking Cityscape Views?
Why Sunset Views from the Islands Are Superior to Mid-Day Shots?
While the Toronto Islands offer a spectacular skyline view at any time, the real magic happens within a specific atmospheric window: the transition from late afternoon to night. A mid-day shot gives you a flat, evenly lit city, but a sunset mission yields a dynamic, multi-layered image that tells a story. The key is to treat the trip not as a single destination but as a multi-stage photographic journey, timed to the movement of the sun.
The strategic advantage of sunset is twofold. First, the low-angled golden hour light (roughly 6:30-7:30 PM in summer) rakes across the glass facades of the financial district, creating a “second sunset” effect as the buildings themselves appear to glow from within. This is an effect completely absent in the harsh overhead light of noon. Second, as the sun dips below the horizon, the blue hour (around 8:00-8:30 PM) provides a deep, saturated backdrop that makes the city’s artificial lights pop with vibrant contrast. This is the moment for capturing that quintessential city-at-night feel, with the sky still holding a hint of colour.
To execute this, your viewpoint logistics must be precise. Avoid the busiest ferry route. While most tourists flock to the Centre Island dock, a smarter plan starts on the quieter eastern side. Taking the 5:30 PM ferry to Ward’s Island allows for a peaceful walk along the boardwalk during golden hour, offering constantly shifting angles of the light. According to data on ferry schedules and peak times, the Centre Island route sees the heaviest traffic, making a Ward’s Island start a strategic move to avoid crowds and secure a prime spot near the Centre Island pier for the main blue hour event. For an added compositional element, frame your Friday evening shots to include the sailboats from the nearby Royal Canadian Yacht Club (RCYC) and Queen City Yacht Club (QCYC), which add life and a sense of place to the foreground.
Finally, your return trip on the ferry offers one last opportunity: a stabilized, moving panorama of the fully illuminated skyline from the water, providing a perfect end to the photographic mission.
How to Reach Polson Pier Without a Car for the Night View?
Polson Pier delivers arguably the most iconic, unobstructed, postcard-perfect view of the Toronto skyline. It’s a favourite among professional photographers for its clean sightline across the harbour. However, its location in a remote industrial part of the Port Lands presents a significant logistical challenge, especially for those without a car. As a location scout, it’s crucial to note that this is a photo spot, not a tourist destination; amenities are virtually non-existent, and planning your access and exit is paramount for a safe and successful night shoot.
Fortunately, several viable options exist for a car-free mission. The choice depends on a trade-off between cost, time, and convenience. Your primary public transit option is the 72B Pape bus, which runs from Pape Station on Line 2. This is the most budget-friendly method but requires careful timing, as you’ll be navigating an industrial area with moderate foot traffic after dark. For those prioritizing safety and directness, a rideshare service like Uber or Lyft from a central point like Union Station is the most efficient, albeit costlier, choice. A third, more adventurous option is using Bike Share Toronto, accessible via the well-lit Martin Goodman Trail, which offers a scenic journey but requires more physical effort.
To make an informed decision, a direct comparison of the viewpoint logistics is essential. The following table breaks down the practical considerations for each method.
| Transport Method | Cost (CAD) | Travel Time | Last Service | Safety Level |
|---|---|---|---|---|
| 72B Pape Bus from Pape Station | $3.35 | 25 min | 1:00 AM | Moderate (industrial area) |
| Uber/Lyft from Union Station | $15-25 | 15 min | 24/7 | High (door-to-door) |
| Bike Share Toronto via Martin Goodman Trail | $7-15 | 30-40 min | 24/7 | Moderate (lit trail) |
Ultimately, the best choice aligns with your personal budget and comfort level. A rideshare offers peace of mind for a late-night return, while the bus and bike options provide a more economical and immersive city experience for the well-prepared photographer.
Riverdale Park or Humber Bay: Which Offers the Best Skyline Panorama?
Beyond the water-level views of the pier and islands, Toronto offers elevated and architecturally framed perspectives that provide entirely different compositional opportunities. The two strongest contenders are Riverdale Park East and the Humber Bay Arch Bridge, and the choice between them is a classic case of compositional trade-off. It’s not about which view is “better,” but which visual story you want to tell. Riverdale offers a classic, compressed panorama, while Humber Bay provides a modern, sweeping leading line.
Riverdale Park East, accessible via a short walk or tram ride from Broadview Station, is famous for its hilltop vantage point. This elevation allows you to use a telephoto lens (around 70-200mm) to compress the distance, making the downtown core appear denser and more imposing. The foreground is dynamic, featuring a running track, a baseball field, and a gentle slope that fills with picnickers in the summer and sledders in the winter. These elements add a layer of human activity and seasonal context that enriches the photograph. The view is straight-on, capturing the full breadth of the skyline with the CN Tower as its anchor.
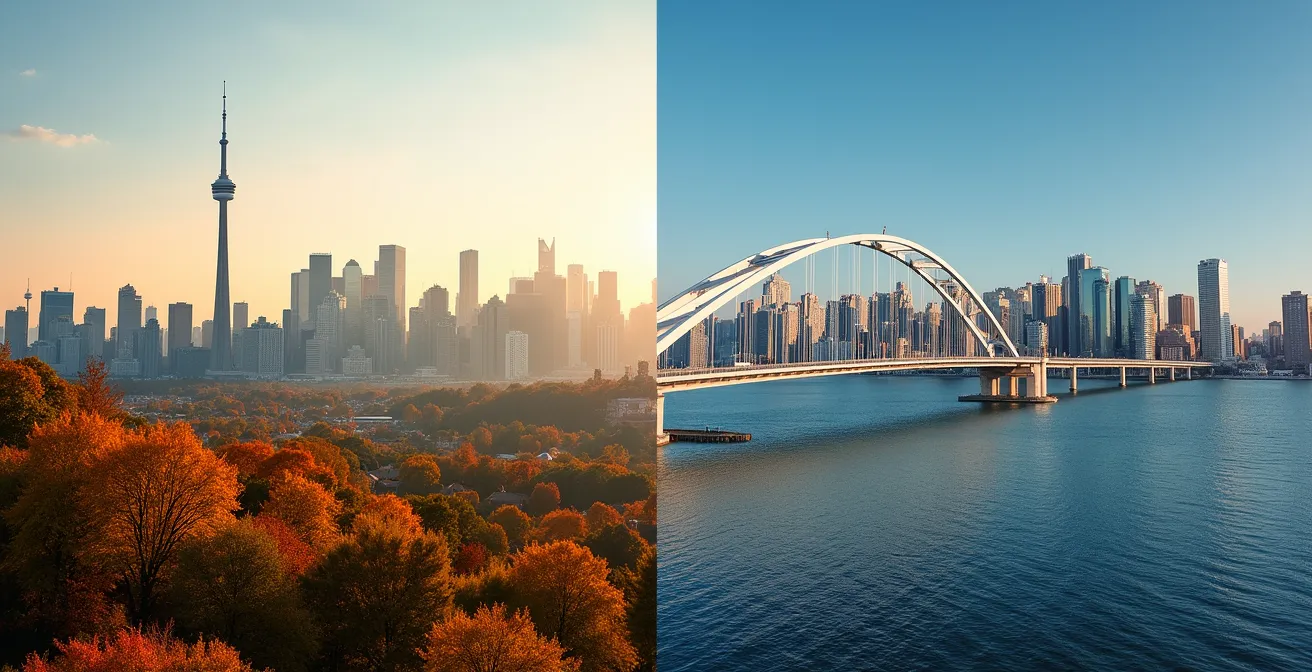
In contrast, the Humber Bay Arch Bridge on the city’s west side offers a wide-angle perspective. The elegant white curves of the pedestrian bridge serve as a powerful framing device and a leading line, guiding the viewer’s eye directly toward the distant skyline. This location is about architecture and flow, creating a sense of journey and modernity. It’s less about capturing the density of the city and more about placing it in a sleek, graphic context. The best shots are often taken during blue hour, when the bridge’s lights contrast with the glowing city and reflections on the water.
So, which is best? For a classic, vibrant postcard shot that feels full of life and texture, Riverdale Park is the superior choice. For a clean, contemporary, and architectural composition that emphasizes lines and form, Humber Bay is unmatched.
The Fog Risk That Can Hide the Skyline Completely in Spring
One of the most dramatic and frustrating variables a photographer can face in Toronto is fog. Specifically, the dense advection fog that rolls in from Lake Ontario during the spring. This isn’t just a light haze; it’s a thick blanket that can completely obscure the skyline, turning a well-planned photo mission into a waiting game. Understanding and anticipating this atmospheric risk is a critical part of your logistical planning, especially from April to May.
The science is simple: in the spring, warm, moist air moves over the still-frigid waters of Lake Ontario. This temperature differential causes the moisture in the air to condense, creating a low-lying, persistent fog bank that hugs the shoreline and islands. According to meteorological data, this phenomenon occurs most frequently in April and May when the lake water remains frigid but air temperatures are rising. A temperature difference of just 10°C between the air and the lake can be enough to trigger it. For photographers at Polson Pier or the Islands, this means the entire subject of your photo can vanish without warning.
However, what seems like a risk can also be an opportunity for truly unique shots. A “sea of fog” with the very top of the CN Tower and the tallest skyscrapers piercing through is a highly sought-after image. The key is to have a strategy. Instead of giving up, you need an execution plan that includes monitoring conditions and having a viable Plan B. This turns a potential failure into a calculated creative choice.
Your Action Plan: The Spring Fog Photography Checklist
- Intel Gathering: Before heading out, check Environment Canada’s Marine Forecast for Lake Ontario, which often includes fog advisories.
- Live Reconnaissance: Monitor the CN Tower’s official webcams for a real-time assessment of fog density and height at the downtown core.
- Hunt for the Apex Shot: If fog is low-lying, aim for a “sea of fog” shot where the tower’s apex punches through the clouds. Higher vantage points can sometimes work for this.
- Execute Plan B: If the skyline at Polson Pier or the Islands is completely socked in, pivot your mission. Head to the Distillery District, where the fog can create incredibly moody, atmospheric scenes among the historic brick buildings and gaslights.
- Know the Conditions: Remember that the best fog conditions occur when the air-to-lake temperature differential exceeds 10°C. Use this as your primary indicator.
By treating fog not as a trip-ruiner but as a predictable variable, you can adapt your plan on the fly and come away with compelling images, whether of a clear skyline or a city wrapped in atmospheric mystery.
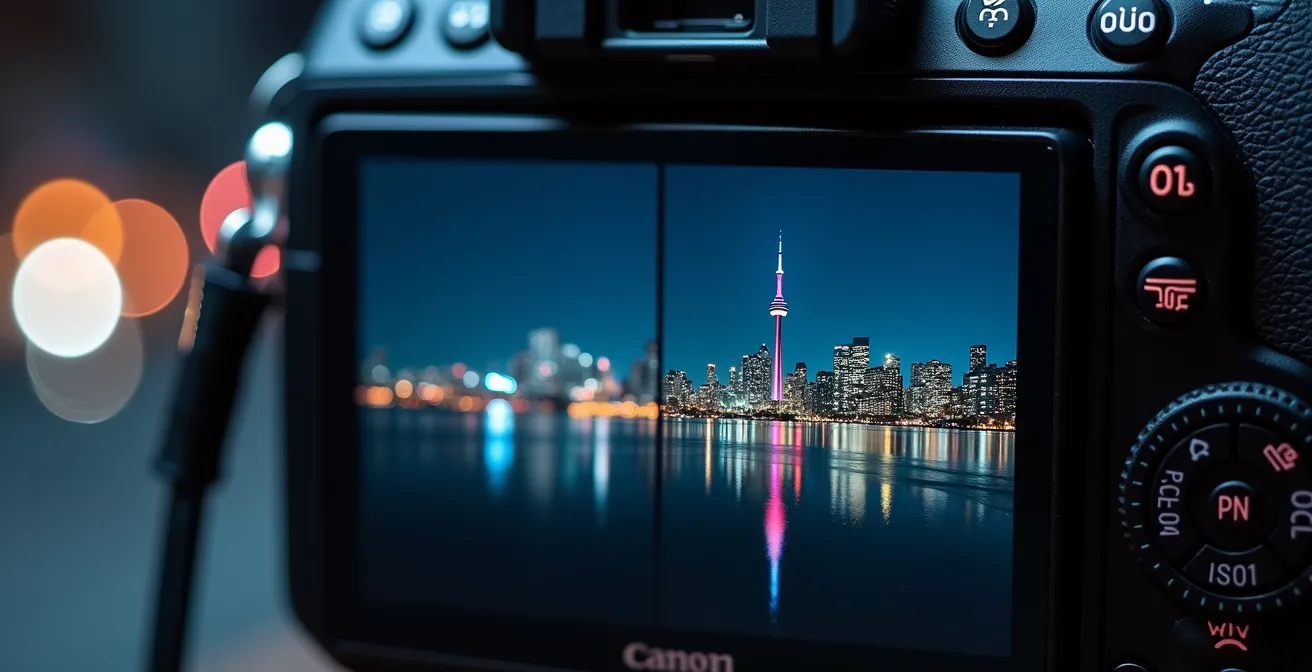
How to Configure Your ISO for Crisp Night Skyline Photos?
Capturing the Toronto skyline after dark is a technical challenge where your camera settings, particularly ISO, play a crucial role. A common mistake is to crank up the ISO to get a bright enough image, but this introduces digital noise, which degrades the quality and sharpness of your shot. The goal is to keep your ISO as low as possible to maintain a clean, crisp image, which requires balancing it with shutter speed and aperture, and almost always necessitates a tripod.
ISO determines your camera sensor’s sensitivity to light. A low ISO (like 100 or 200) is less sensitive, requiring more light (or a longer exposure time) but producing a very clean, noise-free image. A high ISO (like 1600 or 3200) is very sensitive, allowing for faster shutter speeds in the dark but at the cost of noticeable grain or “noise.” For static subjects like a city skyline, a low ISO combined with a long shutter speed (e.g., 15-30 seconds) on a sturdy tripod is the gold standard. This technique not only minimizes noise but can also create beautiful artistic effects, like smoothing the water in the harbour into a glassy, reflective surface.
However, the optimal ISO configuration depends entirely on your specific shooting scenario. A handheld shot from a moving TTC streetcar requires a completely different approach than a long exposure from a fixed position at Polson Pier. Understanding these situational adjustments is key to technical mastery.
| Shooting Scenario | ISO Range | Shutter Speed | Effect | Noise Level |
|---|---|---|---|---|
| Tripod from Polson Pier | 100-200 | 15-30 sec | Glassy water surface | Minimal |
| Handheld on TTC | 1600-3200 | 1/60 sec | Frozen motion | Moderate |
| HDR Bracketing | 100 + 800 | Variable | Dynamic range | Low (blended) |
| CN Tower lights | 400-800 | 2-5 sec | Light trails | Low |
| Blue hour balanced | 200-400 | 8-15 sec | City glow | Very low |
By choosing the right ISO for the job—low for stability, higher for movement—you ensure your final images are as sharp and impactful as the view itself, free from distracting digital noise.
Aquarium or Tower: Which Attraction Fits a 2-Hour Window?
For visitors on a tight schedule, the downtown core around the CN Tower presents a classic time-budgeting dilemma: with only two hours to spare, do you ascend the Tower or explore Ripley’s Aquarium? Both are world-class attractions, but they offer vastly different experiences with equally different “time costs.” The decision hinges on understanding the hidden time sinks and your personal priority: an expansive view or an immersive exhibit.
The CN Tower is Toronto’s most famous landmark, and according to recent tourism data, it attracts over 1.5 million visitors annually. This popularity is its biggest logistical hurdle. On a busy day, the true time cost isn’t just the elevator ride; it’s the security screening and queueing, which can easily exceed 45 minutes. Once at the top, you are rewarded with a breathtaking 360-degree view, but it’s a passive experience. This makes the Tower a high-risk choice for a two-hour window, as more than half your time could be spent waiting in line.
Ripley’s Aquarium of Canada, by contrast, offers far better control over your time. Its system of online timed-entry tickets allows you to bypass the longest queues and enter at a designated moment, making your visit highly predictable. The experience is an active one, moving through mesmerizing exhibits like the Dangerous Lagoon tunnel. While you won’t get a skyline view, you are guaranteed a full, immersive experience within your allotted two hours. For families or those who prefer structured exploration, the Aquarium is the safer, more efficient bet.
However, there is a “hack” for the CN Tower. Booking a reservation at the 360 Restaurant often allows you to bypass the main security and elevator lines. The cost of a meal is higher than a standard ticket, but it includes access to the observation deck. For a couple looking for a romantic and efficient way to see the view, this turns a potential 45-minute wait into a seamless, premium experience, making it a viable—if more expensive—option for a two-hour slot.
The final choice is strategic: risk a long wait for an unparalleled view at the Tower, guarantee an on-schedule immersive experience at the Aquarium, or leverage the restaurant reservation to get the best of both worlds.
How to Rent a Quadcycle Before They Sell Out by Noon?
Exploring the 5km expanse of the Toronto Islands is a highlight of any visit, but for families or small groups, the most coveted mode of transport is the four-person quadcycle. These vehicles are the only way for a group to travel the entire island chain together with ease, which is precisely why they are in such high demand. They often sell out by noon on any sunny weekend, leaving many visitors disappointed. Securing one requires a specific execution plan and an early start.
The mission to rent a quadcycle begins not on the island, but at the ferry terminal on the mainland. Your success depends on being one of the first people to reach the rental booth when it opens. This means catching an early ferry before the crowds build. A disciplined approach will almost always guarantee success.
Here is the step-by-step strategy:
- Be at the Jack Layton Ferry Terminal by 9:00 AM to board one of the first ferries of the day, ideally the 9:30 AM departure.
- Upon arriving at Centre Island, head directly to the bicycle rental booth. Do not get distracted. It typically opens around 10:30 AM, and a line will already be forming.
- When it’s your turn, book the quadcycle for 90 minutes. This is the optimal duration to complete the full island circuit without feeling rushed.
- Plan your route: start by heading west towards Hanlan’s Point for beautiful beach views, then circle back east past the pier and continue towards the more residential and quaint Ward’s Island.
But even with the best plan, sell-outs can happen. It’s crucial to have a Plan B. If the quadcycles are gone, your best alternative is to use the Bike Share Toronto docks, conveniently located at all three main ferry terminals (Centre Island, Hanlan’s Point, and Ward’s Island). While this means splitting up the group onto individual bikes, it still allows you to cover the same ground. Alternatively, the same rental booth offers a large fleet of standard two-wheel bicycles with much higher availability.
By treating the rental as the first objective of your island visit, you can ensure your group gets to explore together, turning a potential point of frustration into a memorable shared experience.
Key Takeaways
- The best skyline photos require a logistical plan covering access, timing, and environmental factors.
- Each major viewpoint (Islands, Polson Pier, Riverdale Park) offers a unique compositional trade-off and requires a different strategy.
- Technical settings like ISO must be adapted to the specific situation, with a low ISO on a tripod being the standard for crisp, static night shots.
Romantic Dates in Toronto: Where to Find the Most Breathtaking Cityscape Views?
A stunning skyline view can transform a simple evening into a deeply romantic memory. For couples in Toronto, the city offers a range of backdrops, from iconic and bustling to secret and intimate. The key to a successful romantic outing is choosing a location that matches the desired mood. While Polson Pier is the classic choice, a true location scout knows the hidden gems that offer a more private and unique experience, away from the crowds of photographers.
For a quieter, more intimate setting, bypass the main parks and head to Chester Hill Lookout. Tucked away at the end of a residential street near Broadview, it’s a spot beloved by locals. It offers a slightly angled, elevated view of the skyline, beautifully framed by the arches of the Prince Edward Viaduct. It’s the perfect place for a quiet conversation while watching the city lights begin to twinkle. Another excellent, lesser-known option is the Governor’s Bridge Lookout, which provides a dramatic perspective overlooking the Don Valley and the historic brick kilns of the Brick Works below, with the downtown core rising up behind it.
If the plan includes post-view cocktails, the strategy changes. The rooftop bar at The Broadview Hotel is an unbeatable choice. Located just south of Riverdale Park, it provides a spectacular, comfortable, and warm vantage point of the east-facing skyline. Watching the sunset here with a drink in hand is a sophisticated and memorable romantic gesture. It combines the breathtaking view with the comfort and service of a high-end establishment, making it a complete evening experience in one location.
These locations move beyond the purely photographic and into the realm of experience. They prioritize atmosphere and intimacy over the technical perfection of an unobstructed shot. They are about sharing a moment, with the beautiful city serving as the silent third character in the scene. The best romantic view isn’t just about what you see, but how you feel seeing it together.
To create the perfect romantic date, select the viewpoint that best fits your story—whether it’s a hidden lookout for a private moment or a chic rooftop bar to celebrate in style. Use this intel to plan your own mission and capture a memory, not just a photograph.
Frequently Asked Questions About Toronto Skyline Photography
Why do quadcycles sell out so quickly on Toronto Islands?
Quadcycles are the only way for families or small groups to traverse the entire 5km length of the islands together, making them the most sought-after rental.
What’s the best backup if quadcycles are unavailable?
Bike Share Toronto has docks at Centre Island and Hanlan’s Point ferry terminals, or you can rent standard bicycles from the same booth which have much higher availability.
How long should I rent a quadcycle for?
90 minutes is the optimal rental duration to cover the main points of interest like Hanlan’s Point, the pier, and Ward’s Island beach without rushing.